Thursday, August 6, 2015

Meet the Teacher Ideas


I just wanted to stop by and share with you some things I do for "Meet the Teacher" night at my school. We have an afternoon the week before school starts that parents and students may come up to tour the school, bring up their school supplies and meet their child's teacher.  It is a fun afternoon! I'm always so excited to meet my new students and parents.  It is also so nice to get their school supplies unpacked and organized and ready to go on the first day of school.  


I use signs to make sure they hit all of the "stations" or important areas before they leave. 
First, they sign in and come in.


Next, they find their desk.
On their desk is a folder with information papers.  A few things about myself, my classroom and some getting to know you forms. Some of the forms came from HERE.  I have them take it home and send it back the first week of school.


Also inside the folder I place an "All About Me Bag" inside for the students to share the first week of school.  You can grab yours HERE


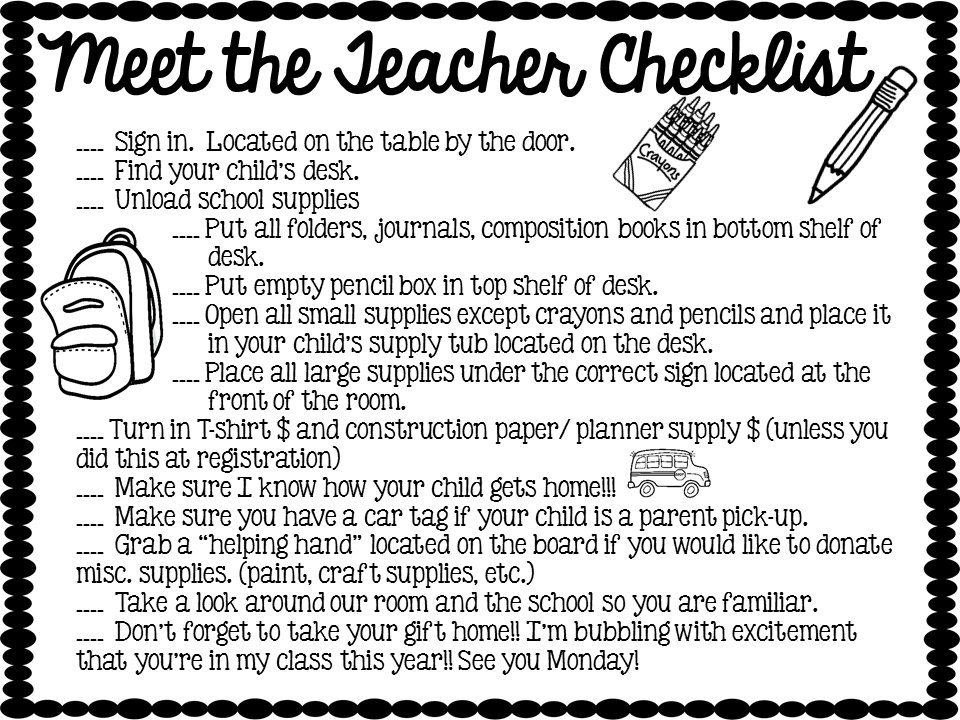
I give each parent a checklist and it is projected on the board to help keep things flowing and organized.  I want to make sure that they and myself don't forget anything because the afternoon is such a whirlwind.  


I put signs up at the front of the room for the large supplies that I have to store and specific directions for the small supplies.  This just saves me a ton of time and the kids LOVE to help.  Plus they learn where thing go. WIN, WIN! 


The small supplies goes in a shoe box size tub, labeled with each child's name.
 
I have found great success with keeping it separate from each others. I store these in a cabinet and when they are in need of another glue stick, etc. I just have them grab one from their tub.
 
 
 While each kid also has their own pencil box in their desk with only crayons, a pencil, big pink eraser and twistables, I also keep caddies on the desk where they keep their scissor, markers and glue.  

 
After they put their supplies away and I know the way they get home each day I want them to take a tour of our classroom and the campus.  Just to get a feel of it and put them at ease for the first day of school.  

 
I also post "helping hands".  They are supplies that are not on the supply list, but we use all the time in our room.  Mainly craft supplies. Paints, googly eyes, cardstock, etc.  I am so grateful for all of my giving parents in the past who have helped!!
 
{just noticed typo! 😳 will fix!}
 
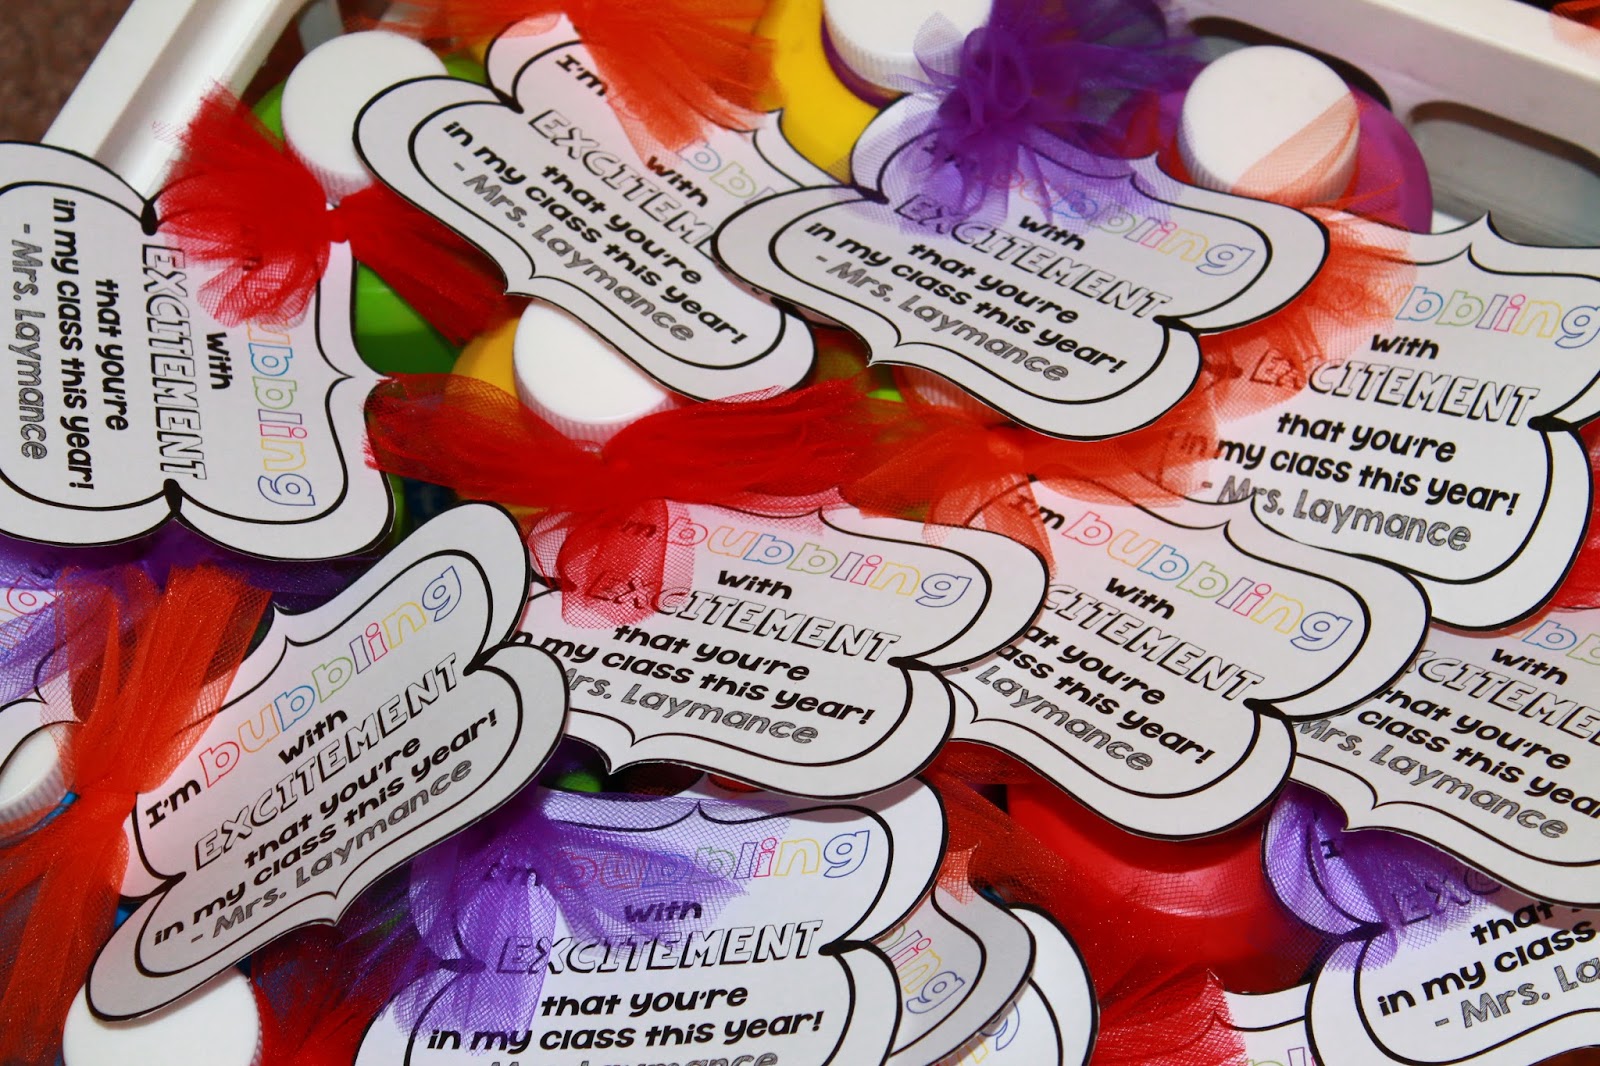
And lastly, they grab their gift! I want them to know how excited I am to have them in my class and really welcome them with excitement!! 


Grab your tag HERE
 
You can grab your numbered "Meet the Teacher" signs HERE!

 
I hope you had a restful summer! Enjoy the back to school craziness!!


Thursday, July 30, 2015

Bulletin Boards {ready for the new year}

Now that everyone is thinking Back to School, I thought I would share my bulletin boards that I am prepping for the new year.  I keep them up during the summer! So glad my school lets us do that.  It saves so much time when we head back to school.  I haven't changed the board itself, just got it ready for my new class. 

On the outside of my room is one of the boards that I hang student work.  I used fabric for the back and scrapbook paper and clothes pins to hang the work on.  


Click HERE to see my tutorial on how to make tulle poms.

This is just a fun board that I have right when you walk into my room.  I hang pictures of my class that I take throughout the year.  The pictures on there now are from last year. I didn't want to have it completely blank, but after I get a few pictures of my new class I will change out the pictures. 


This is where I put my students library cards.  I give each of my students a number at the beginning of the year.  That is how they determine which pocket is for their card.  My school has open library time everyday where they can go the library by themselves so I wanted them to be able to just grab their card and go.

With the phonics program we use at my school there are rule cards, sound cards, picture cards, etc.  My phonics wall is where I post those after they are taught.  

I use this space for my guided math rotations.  I use THESE printables.  I simply glue their picture on the circles so they know what group they are in and use a powerpoint to rotate the stations.


I use this space for my daily 5 rotations. I simply glue their picture to a jumbo Popsicle stick and place one in each pocket. The station cards are on velcro so I can easily rotate them.  And if I need to change a group up, I simply just move their Popsicle stick.
 

This is my reading wall. 
{Have no clue where the letter G went.}

This is just a resource for my students while they are working.  If they are spelling and need help with something that has already been taught.  The cards came from HERE

One of my favorite things to put up is student work.  I put work and themed boards up here.  It will be  blank until the first week and my new firsties are here to start creating! 

Below the green board is my writer's workshop board.  You can read more about that HERE!

My word wall is kept across my cabinets.  The only words that I have on the beginning of the year are color words.  The first week we will add our names and then move to sight words as they are introduced. 

I use this space for my weekly objectives.  You can read more about that HERE!
This is where I post my students birthdays.  The first week I will get their picture and post it by the month of which they celebrate their birthday.  They love looking at it and get so excited when a friends birthday is coming up! 

Don't forget at TPT's big BACK TO SCHOOL sale going on August 3rd and 4th! My entire {growing} store is 20% off!!! Click HERE to visit my store! 


Here are just a few items I have in my SHOP!


Wednesday, July 29, 2015

Learning Objectives


I know posting learning objectives are nothing new, but for the last couple of years it wasn't a "have to". Until now! I knew when we learned that we would have to post our learning objectives I wanted to have them easily accessible, I didn't want to have to write a ton and I wanted them student friendly.  Vague enough where I wasn't changing them constantly, but focused! 

My white board and smartboard is something I use ALL. THE. TIME so I knew I didn't want to cover that up or use space on it with my objectives, so I had to change some wall space to make room for my objectives.  


I have used dry erase pockets for others things in my room and decided they would be great for putting my objective cards in.  

I found this wonderful template HERE! Love her stuff! I just purchased her template and then typed in my objectives for the year on different slides in powerpoint.  Print. And Viola!! 


I made them for the year and labeled them with the corresponding week that I will be teaching that topic so I could just grab it, slide it in and go!


I just put them in file folders for each subject in order that I will be using them. 


Now they are ready to go for the year!!! 


Another thing checked off my list... 


Friday, July 24, 2015

Writer's Toolkits

I must admit I used to not like teaching writing.  *gasp* I did it and I did it the best I could, but I knew there was always a better way.  After several years I realized it wasn't my lessons that were causing the issue, it was the way I organized my writer's workshop supplies.  I was fortunate enough to work with one of the most sweetest people on the planet my first couple of years, who also so happened to be a phenomenal writing teacher.  Lucky me!! I remember always wanting to watch her teach writing and I was always picking her brain for her writing ideas.  From her came my "writer's toolkits"


Writing toolkits are just a way I organize my students writer's workshop supplies. 


My toolkits are simply magazine holders from IKEA (5 for $2).  All of my students are assigned a number at the beginning of the year.  I label things in my classroom with that number for a couple of reasons... 1.  I can reuse them year after year. 2. If someone moves and I get a new student I don't have to change pictures or names, I just slide them in to that spot.  Makes my life way easier during the year. 


I have my students keep their toolkits on a shelf, that way they are easily accessible.  They can go grab them after my mini-lesson during writing or they may use these during Work on Writing during Daily 5.  Also like that my students can take their toolkit and write anywhere in the room and they will have everything they need with them. 


Inside my toolkits--- I keep a folder (which they keep the piece they are publishing in there along with writing paper), their composition book (which is used for pre-writing and drafting).  A spell check page which came from a spelling resource a couple years back and then a phonics dictionary resource that came with our phonics program and a nice sharpened pencil (so they are ready to write).   Through out the year they add things to their toolkits, i.e. mini anchor charts from mini-lesson, thematic vocabulary words, etc. 

I like that everything is together and organized, but not shoved in their desk. 

My writing bulletin board:  I use this as a way of keeping track of where my students are in the writing process.  Now, the process doesn't necessarily go in this order every time and many of my students bounce back and fourth from one stage to the other.  


I take and print all of my students pictures and glue them on jumbo popsicle sticks.  It takes several weeks, months to teach the entire process, but I like for my students to "publish" a story at least once a 6 weeks.  

They simple place their picture in the pocket of the stage they are at.  Either pre-writing, drafting, revising, editing or publishing.  So as I am conferencing with students during writer's workshop I can easily look up at the bulletin board and know where each of my students are in regards to their writing piece.  For example, if Johnny's picture is at pre-wrting I know he is drawing or making a bubble map, etc, and if Sally's picture is at editing I know I want to conference with her before Johnny because that is a more difficult task for them and I will need to get her started.  Hope that makes sense.  


(The pieces around my pockets are from HERE)

Does this take a lot of modeling and practice?!? YES!!! But after they get the hang of it, it's good as gold.  
Writing went from being my most dreaded time of the day to my favorite!